Someday I will make a real sweater.
Someday, when I find not only time, but also the perfect design. Something wonderfully classy that won’t go out of style before I finish knitting it. And something I will actually wear – and I mean a lot, if I’m going to spend that much time making it.
It’s a bucket list kind of thing.
In the meantime, I’m making sure the people I love stay warm.
Their heads, hands, ears, feet… and also their insides.
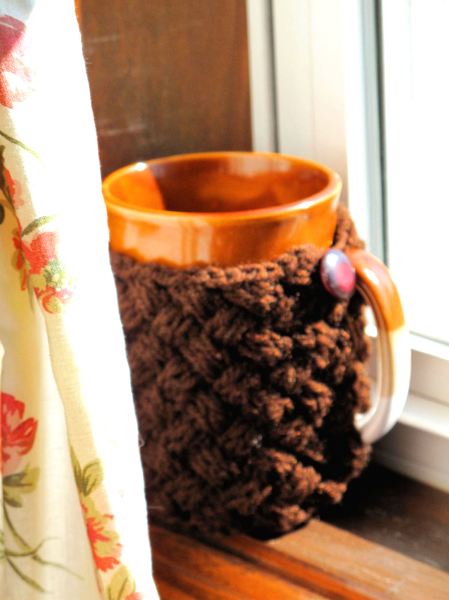
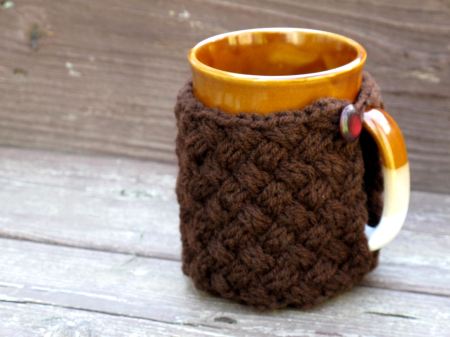
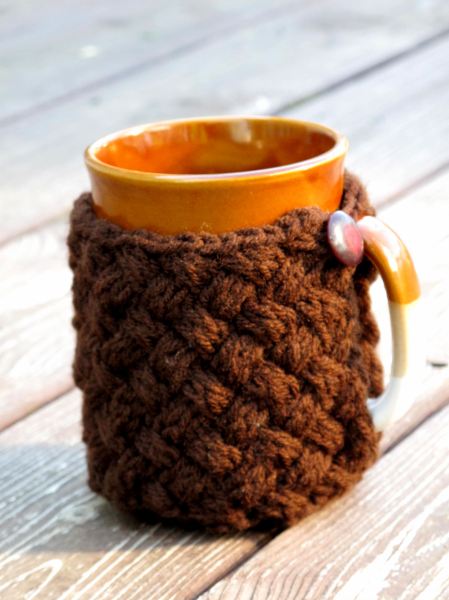
Hence, the mug sweater. It keeps the scalding heat in the drink and out of the fingers – and it lets me get creative!
This pattern begins with the same base as my Spring Wind mug sweater. If you don’t want a base, simply cast on 58 sts and begin knitting in pattern from the bottom edge of the mug sweater.
Basketweave Mug Sweater
Size: Fits a mug 3 ¼” (8.5 cm) in diameter, 3 ¾-4 ½” (10-12 cm) tall
Materials:
Worsted-weight yarn
size 5 (3.75 mm) double-pointed
size 10 ½ (6.5 mm) double-pointed needles
cable or extra double-pointed needle
button
tapestry needle
Gauge: This project isn’t large enough to make it worth your while to make a swatch. Just measure it against your mug as you go. (If you switch it to a circular needle, you can try it on.)
On smaller needles, CO 1 st, using a slip knot.
RS: K1, p1, k1 in same st. (3 sts)
Pass stitches to the other end of the needle and knit on the RS again (as for an i-cord): Kfb each stitch. (6 sts)
Repeat last row. (12 sts)
Divide the 12 sts onto 3 dp needles.
Round 1: *Kfb, k1, repeat from*
Round 2 (and all even rounds): Knit.
Round 3: Repeat round 1
Round 5: *Kfb, k2, repeat from* (36 sts)
Round 7: *Kfb, k3, repeat from* (45 sts)
Round 9: *Kfb, k4, repeat from* (54 sts)
Round 10: Knit.
You should now have a flat circle the same size as the base of your mug. If you need to make it a bit larger, knit additional increase rounds according to the same pattern.
Now, switching to larger needles, purl one round.
Next round: Knit, increasing four stitches evenly spread out.
Basketweave Pattern:
Abbreviations: C4F = Slip two stitches purlwise onto cable needle and hold in front of work. Knit the next 2 stitches from the left-hand needle, then knit the 2 stitches from the cable needle.
C4B = Slip two stitches purlwise onto cable needle and hold behind work. Knit the next 2 stitches from the left-hand needle, then knit the 2 stitches from the cable needle.
Round 1: K2, *C4F, repeat from * to end.
Round 2: Knit.
Round 3: *C4B, repeat from *, K2.
Round 4: Knit.
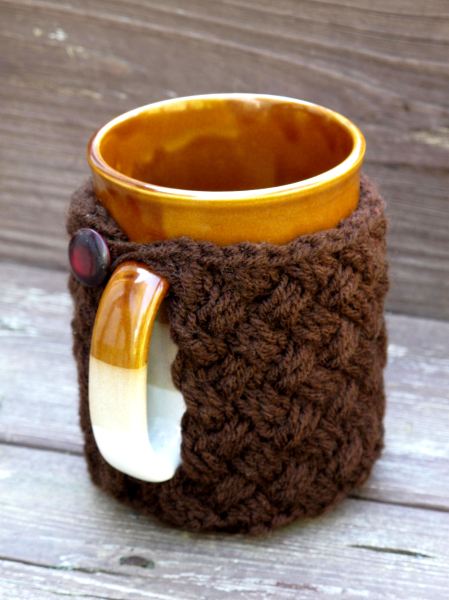
Knit in the basketweave pattern to the height of your mug’s handle.
Then work back and forth, purling all stitches on all even or WS rows.
Row 1 (RS): K2, *C4F, repeat from * to end.
Row 2: Purl
Row 3: *C4B, repeat from *, K2.
Row 4: Purl
Work in pattern until the piece reaches your desired height, ending with row 4.
Next row: K2tog, *slip two stitches purlwise onto cable needle and hold in front of work. K2tog from left-hand needle, then knit the 2 stitches from the cable needle. Repeat from * to end.
To bind off: Go back to the first dpn with the RS facing you. Slip 2 stitches purlwise onto your left-hand needle, then pass the first over the second. Continue in this manner until all stitches are bound off.
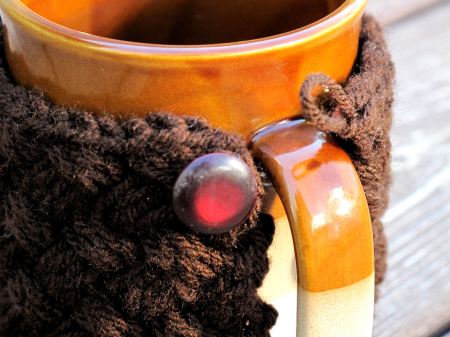
Sew a button to one of the top corners. On the opposite corner, make a loop large enough to pass over the button. Weave in all ends.
Button it up, then go pour a mug of whatever you like to keep your insides warm. Or fill the mug with tea bags and hot chocolate mix, and give it as a gift!
 P.S. Thanks to Rachel at Knitting Pattern Central for linking to my patterns!
Do you allow for this pattern to be used for commercial use (ie. Etsy)?
Hi Danielle! All I ask is that if you use it commercially on Etsy, you link back to my pattern. Thanks for asking!
Where exactly do you start from if you don’t want a bottom?- confused
Carol, if you don’t want a bottom, you can start right off in the basketweave pattern. You can begin by working in the round, as I did, or you can work the whole piece back and forth on straight needles. Then you can sew or button it together however you prefer. Does that help?
Thanks for this wonderful pattern. I made three for teacher gifts! I did modify the bottom of the last one to start using Emily Ocker’s Circular cast on to cast on 12 stitches. Worked beautifully.
Thanks for your feedback, Colleen! I’m glad you liked it – and that it adapted well!
Pingback: By Popular Demand | Spicy Life
I want to thank you for posting your mug sweater patterns!! I love all of them so much and have learned so much about knitting as I’m making them! I making all my tea/coffee drinkers mug sweaters for Christmas, and I’m so excited. Thanks again for your patterns!!
I’m a little confused – in the pattern I don’t see where the gap would appear for the handle.
The gap is created when you begin working back and forth rather than in the round. (See after round 4)
Ok I feel silly but I’m confused on what to do when it says work back and forth purling all stitches on all even or WS rows. Do I purl all stitches on every needle without joining in the round?
Yes, back and forth means you *stop* working in the round and purl all stitches on the opposite side.
Thank you
Pingback: 25 DIY Coffee Cup Tutorials
Pingback: Idea para decorar tus tazas
Pingback: Idea para decorar tus tazas | AutoBlog
OK, I am such a visual learner even from your explanation to Chrissy I can’t figure it out. . .does that mean “flipping” over the double pointed work and purl all the stitches on the opposite side or transferring the work to two straight needles? Sorry, it it my first try using dpn’s!
Darlene, you are right! You can keep using dpns, and you flip the piece to work along the opposite side instead of in the round.
I have some sport weight yarn that I would love to use for this pattern. Any ideas on how to convert the pattern from worsted to sport weight?
Thanks!
Cindy, the best way would be to continue increases (as per the note after round 10) to make a flat circle as large as your mug’s base. Then, just make sure you knit the basketweave pattern with a multiple of 4 + 2. That should do it!
On Fri, Jul 25, 2014 at 12:57 PM, Spicy Life wrote:
>
Would you use the same sized needles or a smaller size for the sport weight?
I would use smaller needles, perhaps slightly larger than what is recommended for your yarn.
On Fri, Jul 25, 2014 at 4:50 PM, Spicy Life wrote:
>
If you don’t do the base, what would you recommend for attaching it at the bottom? You have the button at the top – would you just make another loop and add another button to the bottom too?
Yes, good idea! I would probably make the loops wrap around the handle as well, to make them secure.
I adore your mug patterns.
Thank you so much.
I made two last night
Starting another tonight.
And I really get a kick out of reading your blog !!
Awesome
Thanks again
Linda
do I need 3 dp needles of each needle size?
Hi Camilla! Yes, you’ll need three needles at both stages. The smaller size are for the base, and the larger ones for the sides.
Pingback: 12 Crochet Mug Warmer Free Pattern Ideas - Crochet with Patterns